

Key Takeaways
- Turning off power at the breaker before touching any wiring is non-negotiable for safety.
- Photographing your existing thermostat wiring prevents costly reconnection mistakes.
- Most homes use a standard 24V low-voltage system that smart thermostats support.
- A missing C-wire can often be resolved with an adapter kit rather than full rewiring.
- Smart thermostat compatibility depends on your HVAC system type — verify before starting.
- Ecosystem compatibility with your smart home platform determines long-term functionality.
What you will need
What Makes Smart Thermostat Wiring Approachable
The biggest barrier most homeowners face is the wiring — but residential thermostat circuits operate at just 24 volts, far below the household voltages that power outlets and light fixtures. The wires are thin, color-coded, and connect to clearly labeled terminals. Anyone who can follow a diagram and label before they disconnect can handle this task safely.
That said, smart thermostats are not a universal fit. They work with the vast majority of central forced-air systems, but homes with electric baseboard heat, multi-zone hydronic (hot water) systems, or certain older heat pumps may require different equipment or professional installation. If you're newer to smart home technology overall, our introduction to home automation is a helpful starting point before diving into individual device setups.
What you will need
The steps below assume a standard low-voltage central HVAC system. If you're uncertain about your system type after Step 1, consult your HVAC equipment documentation or a qualified HVAC technician before continuing.
Non-Contact Voltage Tester
Confirms that power to the HVAC circuit is fully off before you handle any wiring.
Flathead and Phillips Screwdrivers
Used to remove the existing thermostat faceplate and secure the new mounting plate to the wall.
Masking Tape and Marker
For labeling each wire with its terminal letter before disconnecting — prevents mix-ups during reinstallation.
C-Wire Adapter Kit
Provides continuous 24V power to the thermostat when a dedicated C-wire is absent from the existing wiring bundle.
Level (mini or app-based)
Ensures the new thermostat wall plate is mounted straight, which matters for display readability.
Common Installation Problems and How to Avoid Them
Most smart thermostat installation failures trace back to a handful of predictable issues. Understanding them before you start reduces troubleshooting time significantly.
Always Cut Power at the Breaker First
Before removing your existing thermostat or touching any wiring, switch off the circuit breaker controlling your HVAC system. Even though thermostat wiring is low voltage (typically 24V), the air handler and furnace themselves carry line voltage that can cause serious injury. Do not rely solely on the thermostat's power button or a wall switch. Use a non-contact voltage tester to confirm the circuit is dead before proceeding.
Skipping the compatibility check. A thermostat that doesn't support your system's staging or heat pump configuration will either malfunction or simply not activate certain modes. Always verify system compatibility — specifically whether your system is single-stage, two-stage, or a heat pump with auxiliary/emergency heat strips.
Misidentifying the C-wire situation. The C-wire (common wire) completes the 24V circuit and provides continuous power to the thermostat's Wi-Fi radio and display. Without it, some thermostats attempt to "power steal" from other wires, which can cause intermittent HVAC behavior. Check your existing wiring bundle carefully — a spare unused wire is often already present.
No C-Wire? You Have Options
Many older homes lack a C-wire (common wire), which most smart thermostats need for continuous power. Before assuming you need an electrician, check whether your thermostat has an unused wire tucked behind the wall plate — there may be a spare that can be repurposed. Most smart thermostat manufacturers also sell plug-in power adapter kits that draw power directly from the furnace control board without requiring new wiring.
Incorrect wire termination. Wires not fully seated in terminals, or wires connected to the wrong terminal, produce the most frustrating symptoms — a thermostat that powers on but can't activate heating or cooling. The photograph you take before disconnecting anything is your single best safeguard here.
If you encounter any of these issues and aren't sure how to resolve them, stopping and calling a licensed HVAC technician is always the right call. The myths that discourage smart home adoption often overstate the complexity — but respecting the limits of a DIY approach is equally important.
High-Voltage Systems Are Not DIY-Friendly
Line-voltage thermostats — common in homes with electric baseboard heaters — operate at 120V or 240V and are not compatible with standard smart thermostats. If your existing thermostat wires are thick (similar to standard household wiring) rather than thin low-voltage wire, stop and consult a licensed electrician. Working on high-voltage circuits without proper training is dangerous.
Check HVAC Compatibility Before You Start
Smart thermostats are designed for conventional 24V low-voltage HVAC systems — central forced-air furnaces, central air conditioning, and heat pumps. Confirm your system type by checking your furnace or air handler documentation, or by counting the wires behind your current thermostat. Systems with two to five thin wires (typically 18–22 gauge) at the thermostat are almost always low-voltage compatible. Also verify whether your HVAC setup is single-stage, multi-stage, or a heat pump with auxiliary heat, since some smart thermostats do not support every configuration.
Turn Off Power and Photograph Your Wiring
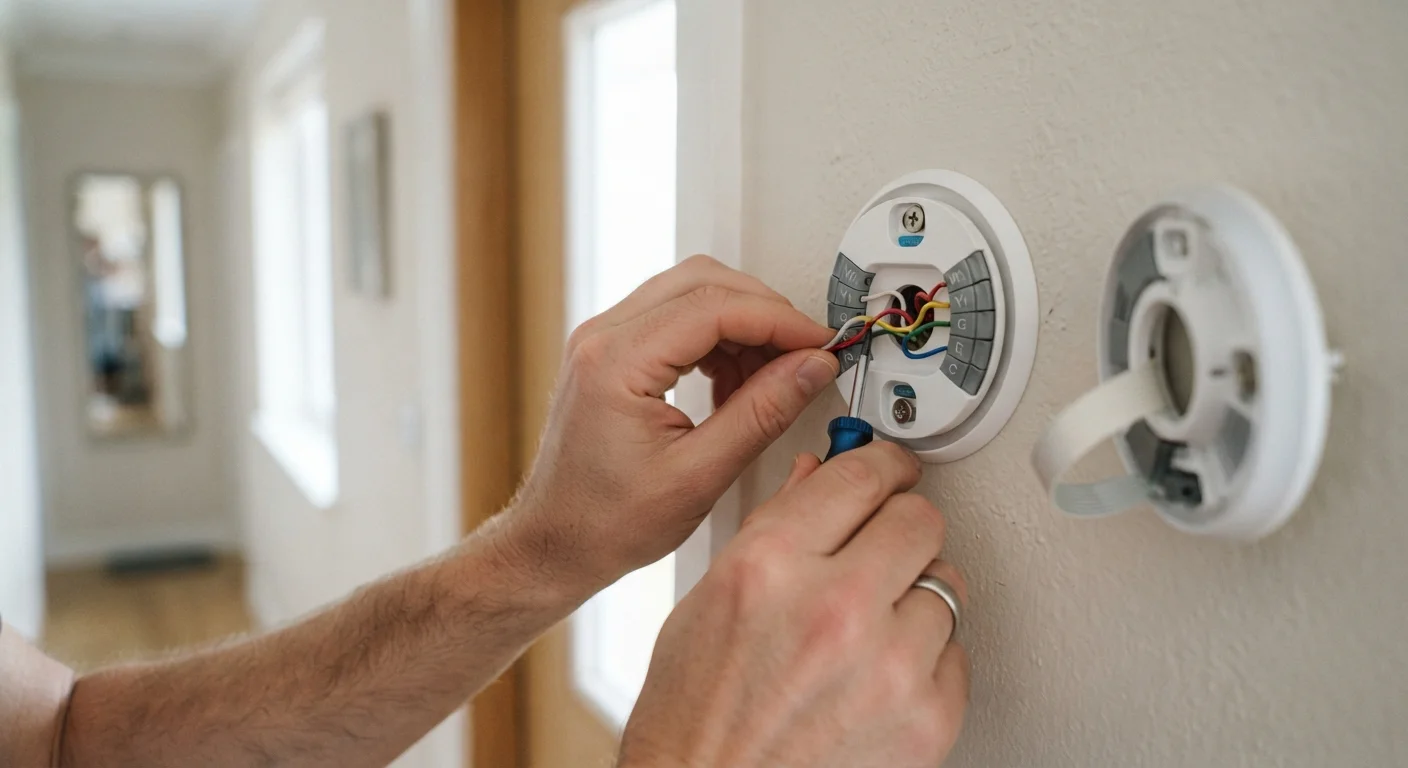
Locate your home's electrical panel and switch off the breaker labeled for the furnace, air handler, or HVAC system. Confirm the circuit is dead using a non-contact voltage tester near the thermostat. Remove the thermostat faceplate — most pop off or unscrew — to expose the wiring. Before touching anything, take a clear photo of all connected wires and their terminal labels (R, C, G, Y, W, etc.). This photo is your fallback reference if anything gets confusing later.
Label and Disconnect the Existing Wires
Tear small strips of masking tape and wrap one around each wire, writing the terminal letter it was connected to. Only then disconnect the wires one at a time. Prevent wires from sliding back into the wall by wrapping them around a pencil or threading them through a piece of cardboard. Remove the old thermostat's mounting plate from the wall.
Mount the New Wall Plate
Thread the labeled wires through the opening in the new smart thermostat's mounting plate. Hold the plate against the wall, use a level to confirm it's straight, and mark the screw hole positions lightly with a pencil. If the new plate doesn't line up with existing screw holes, use the included wall anchors. Feed the wires through, then secure the plate firmly — a loose mount causes connection issues over time.
Connect the Wires to the New Thermostat
Refer to both your labeled wires and the new thermostat's wiring diagram (included in the manual or shown in the companion app). Insert each wire into the corresponding terminal — most smart thermostats use push-in or screw-down terminals labeled to match standard designations. If your home lacks a C-wire and the thermostat requires one, install the manufacturer's power adapter kit at this stage per its included instructions before connecting the thermostat.
Restore Power and Complete App Setup
Snap or click the thermostat display onto the mounted plate, then restore power at the breaker. The thermostat should power on within seconds. Download the manufacturer's companion app and follow the in-app setup wizard, which typically walks you through Wi-Fi connection, system type confirmation, and scheduling preferences. If the app prompts for your HVAC system configuration, match it to what you confirmed in Step 1.
Test Heating, Cooling, and Fan Functions
Manually trigger each mode through the thermostat or app: set a heating setpoint above room temperature and confirm the furnace activates within a minute or two; set a cooling setpoint below room temperature and confirm the AC compressor engages; test the fan-only mode separately. Listen for unusual noises and check that conditioned air is actually reaching your vents. If any mode fails to respond, recheck the corresponding wire connection before troubleshooting further.